Documentation menu
Floor plans and positioning
Build a site and floor map, calibrate rooms, pin known locations, and investigate WiFi experience and coverage with their positioning evidence.
Monitor → Infrastructure → Floor plans places wireless observations in the context of a building. Sites organize floors, rooms provide recognizable areas, and pins connect agents and access points to known locations. The view can also show estimated positions and roaming samples derived from radio observations.
Create a site and floor
- Choose New site. Set a Key, such as
hq, and an optional display name. Use the same key as the agents’sitetag for the site’s positioning scope. - Choose New floor plan and enter a floor label.
- Select Upload an image for a PNG, JPEG, or GIF, or Draw from scratch to begin with a blank grid.
- Open the floor and switch to Edit. Set Stack position to organize its position in the site’s floor list.
The site overview brings together floor health, pinned access points, and collection coverage. Site health also considers evidence from agents pinned on its floors or hearing its pinned radios; membership and radio evidence still need checking when observations appear on an unexpected floor.
Calibrate scale and draw rooms
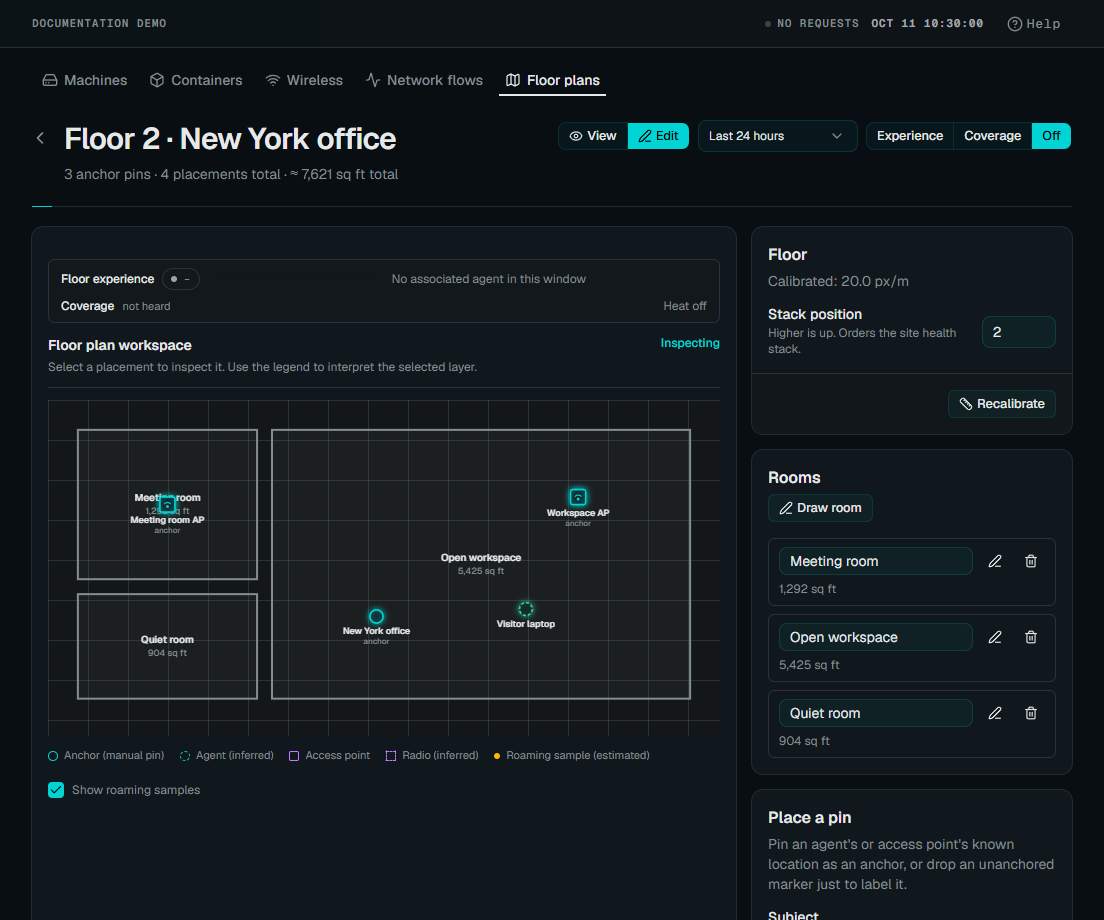
Choose Calibrate scale, click two points a known distance apart, and enter that real-world distance. Calibration connects image pixels to physical length so the page can estimate room and total floor area.
Choose Draw room, click its corners, and click the first corner again or press Enter to finish. Escape cancels. Rename rooms to match locations people recognize; edit a room’s shape by dragging its corners.
Room areas are approximations based on the drawn outlines and calibrated scale. Until scale is set, an unavailable area does not mean a zero-sized room. Calibration of the drawing is also separate from proving an inferred device’s physical location.
 Enlarge screenshot
Pin known locations
In Place a pin, choose a subject:
- Agent for a fixed endpoint whose position you know.
- Access point for a physical unit grouped on the Wireless page. One pin covers all its radios.
- Single radio (BSSID) for an individual radio when a physical group is not appropriate.
- Bluetooth beacon using the exact beacon ID from a recent BLE scan.
Select Pin as anchor (known real-world position) only when the location is known, then use the placement tool to mark it on the floor. An unanchored marker can label a subject without asserting a surveyed position.
Known anchors help align inferred positions with the floor. With no anchors, a relative layout has unresolved location and orientation. Additional useful anchors and independent observations can improve the fit, but inferred positions remain estimates affected by radio propagation and the available evidence.
For Bluetooth beacons, copy the ID from the result rather than reconstructing it. IDs may use an iBeacon UUID/major/minor, Eddystone namespace/instance, or a reported MAC identifier. A mismatched ID does not connect the pin to its samples.
Choose what the map means
Switch back to View and select a layer:
- Experience uses the associated agent’s actual link RSSI. Health summaries and grades describe associated-link evidence, with SNR where available.
- Coverage uses radio reception, including the strongest radio heard. It can show observations from agents that are not associated with that radio.
- Off removes the heat layer so placements and floor geometry are easier to inspect.
Use the legend and select a placement for its evidence. Read wireless experience and coverage before comparing the layers: nearby signal and the link a user is using answer different questions.
The floor and site views have a time-window selector for wireless health and samples. Saved room shapes, calibration, and placements are current configuration; changing the window does not rewind the building model.
Read roaming samples as estimates
Enable Show roaming samples to include observations from agents without a fixed pin on a floor. Their associated and visible pinned radios can provide evidence for a floor and a coarse position. The result distinguishes known pins from estimates and records the observation time.
A laptop hearing radios through a wall or from another floor can have ambiguous positioning evidence. A sample with too little usable radio context may remain unplaced. Neither the heat layer nor a converged position estimate proves precise indoor tracking or complete coverage of every part of the building.
Example: complaints from one meeting area
- Choose the site, floor, and time window covering the complaints.
- Inspect Experience for the affected agents, then switch to Coverage. Determine whether they had a poor associated link despite hearing another strong radio.
- Select the relevant access point and agent placements. Check which radios belong to the unit, sample times, and whether locations are pins or estimates.
- Compare floor and site summaries to see whether the observations are local or shared across several floors.
- Check the same agents’ service and path tests before attributing an application problem entirely to WiFi.
If the floor has no useful heat layer, first verify recent WiFi scans and pinned radio membership. A drawing alone supplies no measurement. For unplaced samples, review site tags, anchors, and the radios those agents actually heard.
Manage the map
Deleting a room removes its outline without deleting nearby placements. Removing a pin changes positioning context. Deleting a floor removes the floor-plan image and its saved placements; the confirmation describes that consequence.
Keep physical access-point groups and their radio membership up to date when hardware is replaced. A floor model based on the old unit cannot reliably describe observations from its replacement merely because the SSID stayed the same.